Wednesday 29 October 2014

Hand Made Custom Shabby Wedding Sign Step By Step


Thanks for stopping by, I have a simple hand made sign step by step to share today.
I made this sign for one of my better halves best friends who is getting married next month.
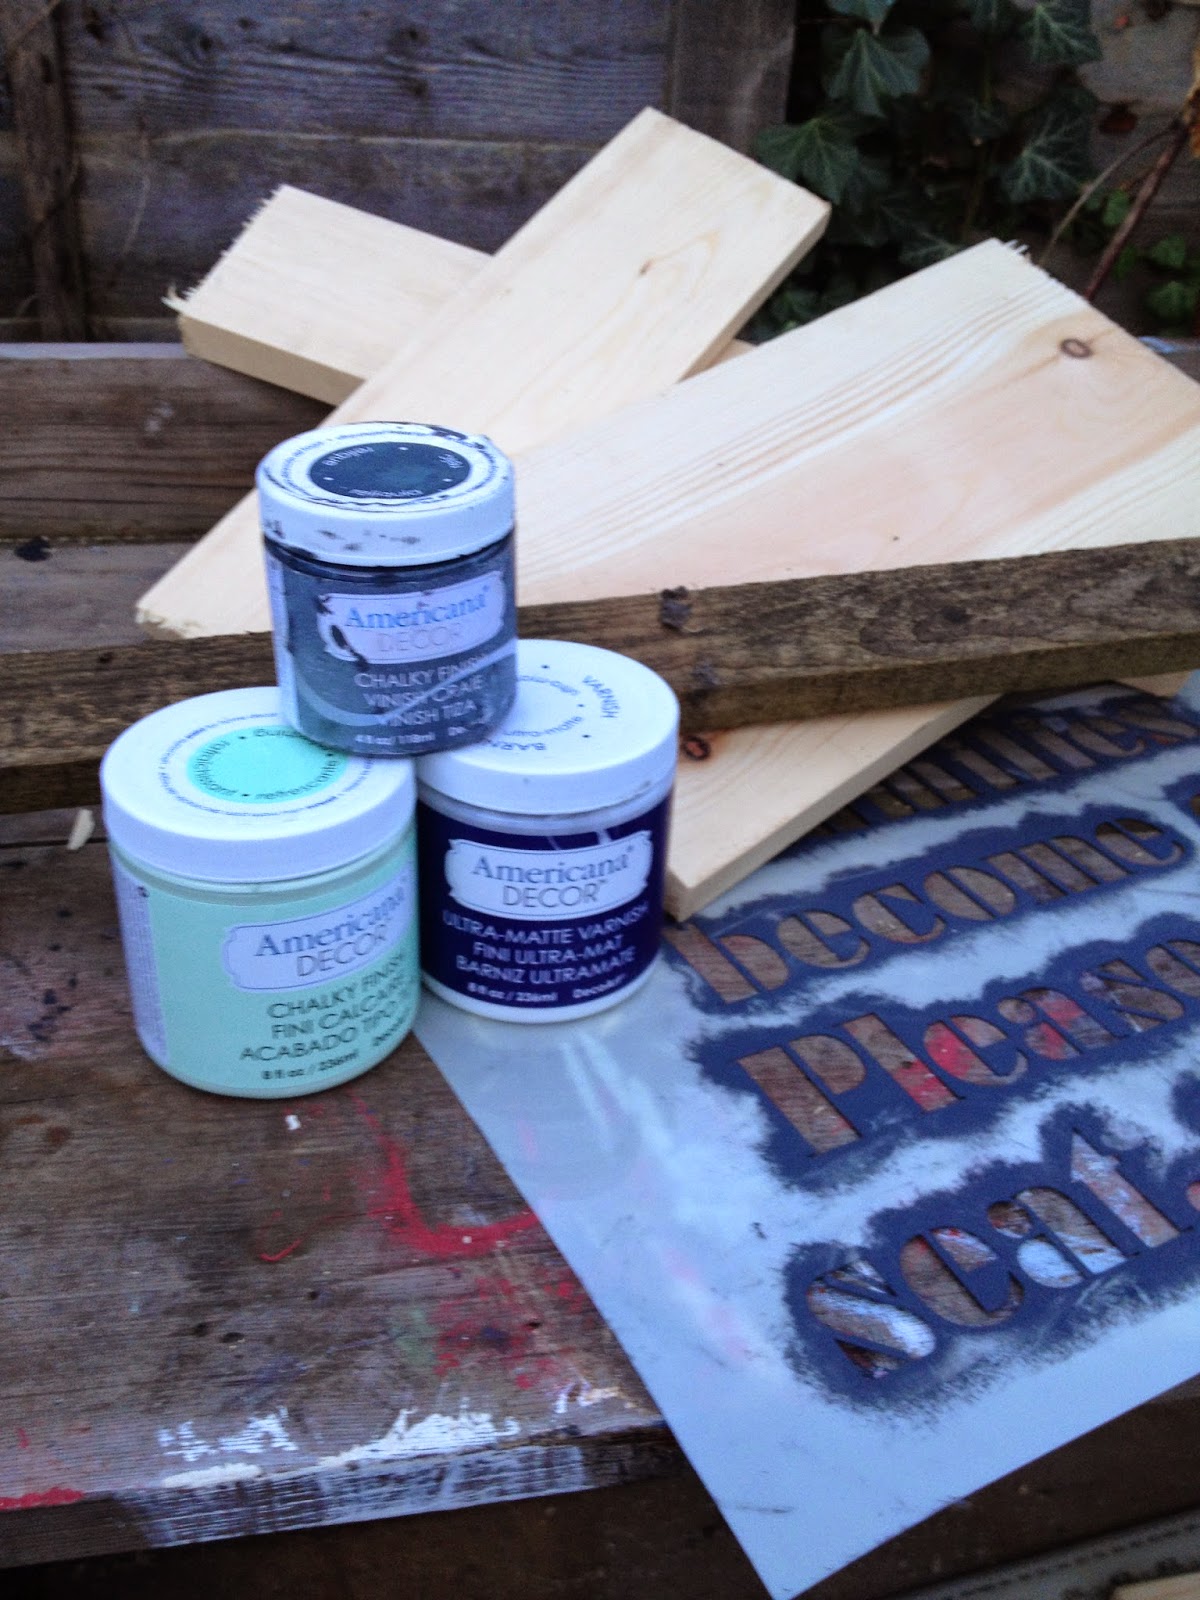
The sign was built from wood scraps I had lying around, Decoart Chalk Finish Paints and a Custom Designed Stencil I got made by Lisa from That Craft Place.

Here is what you will need.


Decoart Chalk Paints..
I used Relic and Refreshing.

Decoart's Ultra Matte varnish.

Stencil.

Wood off cuts,  4" x 1" and 6" x 1" Tile Baton.

Electric Sander..
 I have a black and decker mouse.
Medium grade sand paper and Fine grade sand paper

Small Nails and a punch.


Cut your planks and tile baton to size to size. My sign is roughly A3 sized.
Lay the tile baton out to create the back supports and nail the planks to the batons.Use the nail punch to punch the nails below the surface of the wood, this will stop the Sander from catching the nails and leave a nicer finish.


I used Decoart's Relic for the base coat. Once dry sand back with a medium grade sand paper till you reach the level of distress you require.


 I used Refreshing for my second colour, painted over everything and once dry sanded back using a medium grade sand paper again keep going till you reach the level of distress you require. Finish of with a light sanding with fine grade sand paper, this will give you a really nice smooth finish.


I used stencil tape to keep my stencil in place and a stencil brush to apply Relic. Using the dark grey tied in with my base colour and is a little less stark than Black.
I stipple with my brush and this leaves the paint quite textured, a very light rubbing with some sand paper by hand will smooth this down and I like to scuff the words up a little to help add to the aged look.
The sign was finished of by applying 3 coats of Ultra Matte varnish.


Now with the popularity of shabby signs popping up pretty much everywhere with absolutely crazy prices you can make your own for a fraction of the cost and have it tailor made with your colour choice and whatever phrase you require, Its also a nice solid piece, no cheap mdf or laser printed piece of rubbish.
Thanks for stopping by. x



Thursday 23 October 2014

Winter Blues


Ok, now the title may be a little more melancholy than the table deserves ;)
I have another Pie Crust table charity shop find and wanted to try something a little different so I went for shades of blue in the Decoart Chalk Paint range.
Now if you are new to these paints, they are a great,easy to use, clean chalk finish paints. There is no need to sand down the surface or any other prep work just make sure it is clean from dirt and there are no loose or flaky bits of varnish etc.


After the table had been dusted down I gave it two coats of Legacy, this is the darkest blue in the range at the moment, the table was then sanded back with my little electric sander to get back to the varnished wood.
The table was dusted down and two coats of Escape were added, this is the next shade of blue up in the range. Once dry this was also sanded back revealing both the darker blue and the varnished wood underneath.
For durability and to help bring out the colours even more the table was given two coats of Decoarts Satin Varnish.
The pictures don't quite do the table justice, the blues are almost electric and I am really pleased with how it turned out.
Thanks for stopping by. xxxx

Wednesday 22 October 2014

Le Table Noir ;)


So how is everyone doing? Now I know things have been a little on the quiet side recently but I have a good reason honest, We are about to buy our first house and things have been manic on that front, I was also kept very busy last month prepping for the hand made fair at Hampton Court.
More on the event to follow latter but a big thank you to all who made it out, the Decoart Chalk paint and stencils went down an absolute storm and I was kept busy demoing for the 3 days non stop.
Now talking about the stencils I have used two of the Decoart stencils for my little pie crust coffee table.
The distressed harlequin and the Cafe Paris stencil.


It seems that plain black seems to be trending at the moment for the shabby chic'ers and I am not upset about that being a fan of all things gothic so I thought I would give my take on the colour scheme using the Carbon black as my base and my stencilled details with Relic.
The table started of like this.


A totally ordinary charity shop find, very uninspiring and ugly looking plain table.


The table has been finished with a couple of coats of Decoarts clear wax. This really brings the colours to life with an almost wet look as well as a beautifully tactile finish that is very durable.


Thanks for stopping by. Ill be sharing a few of my samples from the Hand Made Fair in the next few days. xx Hopefully you will  stop by again.